

What’s better than a sticker? We can answer this one… custom made stickers! We beavers know the value of personalization, in fact we’re in the business of helping people express themselves. This philosophy extends to our stickers, which not only come in a plethora of sizes, shapes as well as special finishes, they can also be die cut to any shape under the sun.
We’ve put together a quick and easy guide on how to build your own die line for stickers in Illustrator for those who want to take full advantage of how customizable our products can be. If you don't have Illustrator or just want to save yourself some time, take advantage of our design services. We'll take care of everything for you!
 hbspt.cta.load(19901571, '6ef47086-1b02-4a46-8ec9-5b643da73e13', {"useNewLoader":"true","region":"na1"});
 What is a die line? Why do I need one?
A die line is a visual tool used in design. In the sticker printing process, it will indicate where the cuts will be made. It’s important that every design is laid out with them, either prior to submitting an order or via our design team, so that this information can be translated during the print process.
Do I need to add a die line to my file to order die cut stickers from Busy Beaver?
We can actually apply a die line to your custom die cut stickers for you! Our talented design team is more than happy to take on that step of the process. You can even request a free digital proof with your order to see what it will look like before your stickers go into production. That way you can give us the thumbs up that you're happy with the shape before your custom die cut decals print.
How can I add a dieline for printing to a file myself?
If you want to learn how to make a dieline, you’ve come to the right place! By following just a few simple steps in Illustrator, you can set up your file so that it’s perfectly print ready!
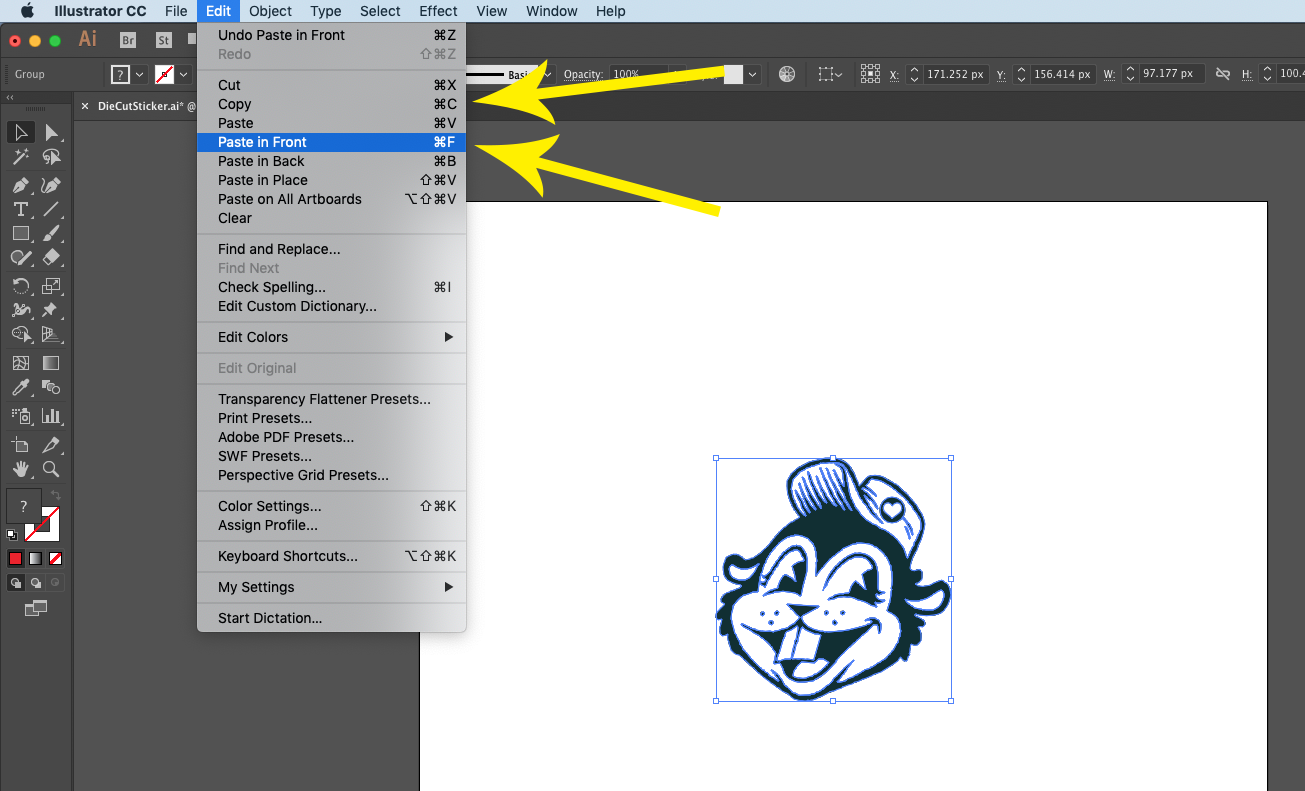
Step 1: Select your image in Illustrator. Copy the selected image and then Paste In Front of the original.
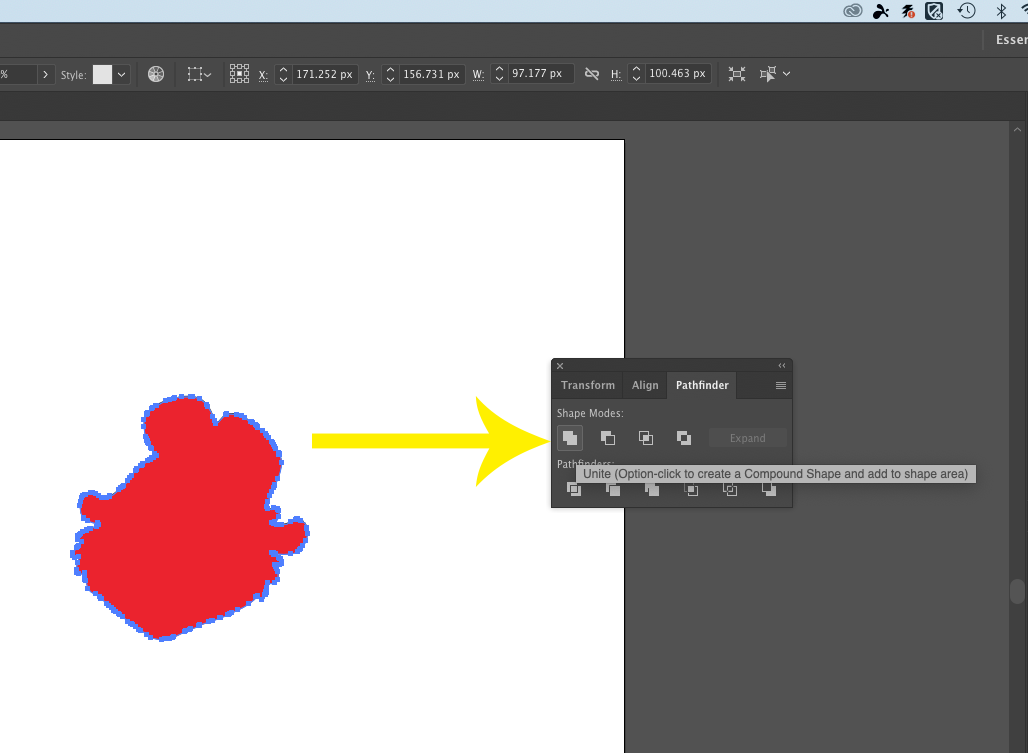
Step 2: With top copy selected, use the Window drop down to select the Pathfinder tool. Select Unite! We added a fill color that would stand out from the artwork though this is not mandatory.
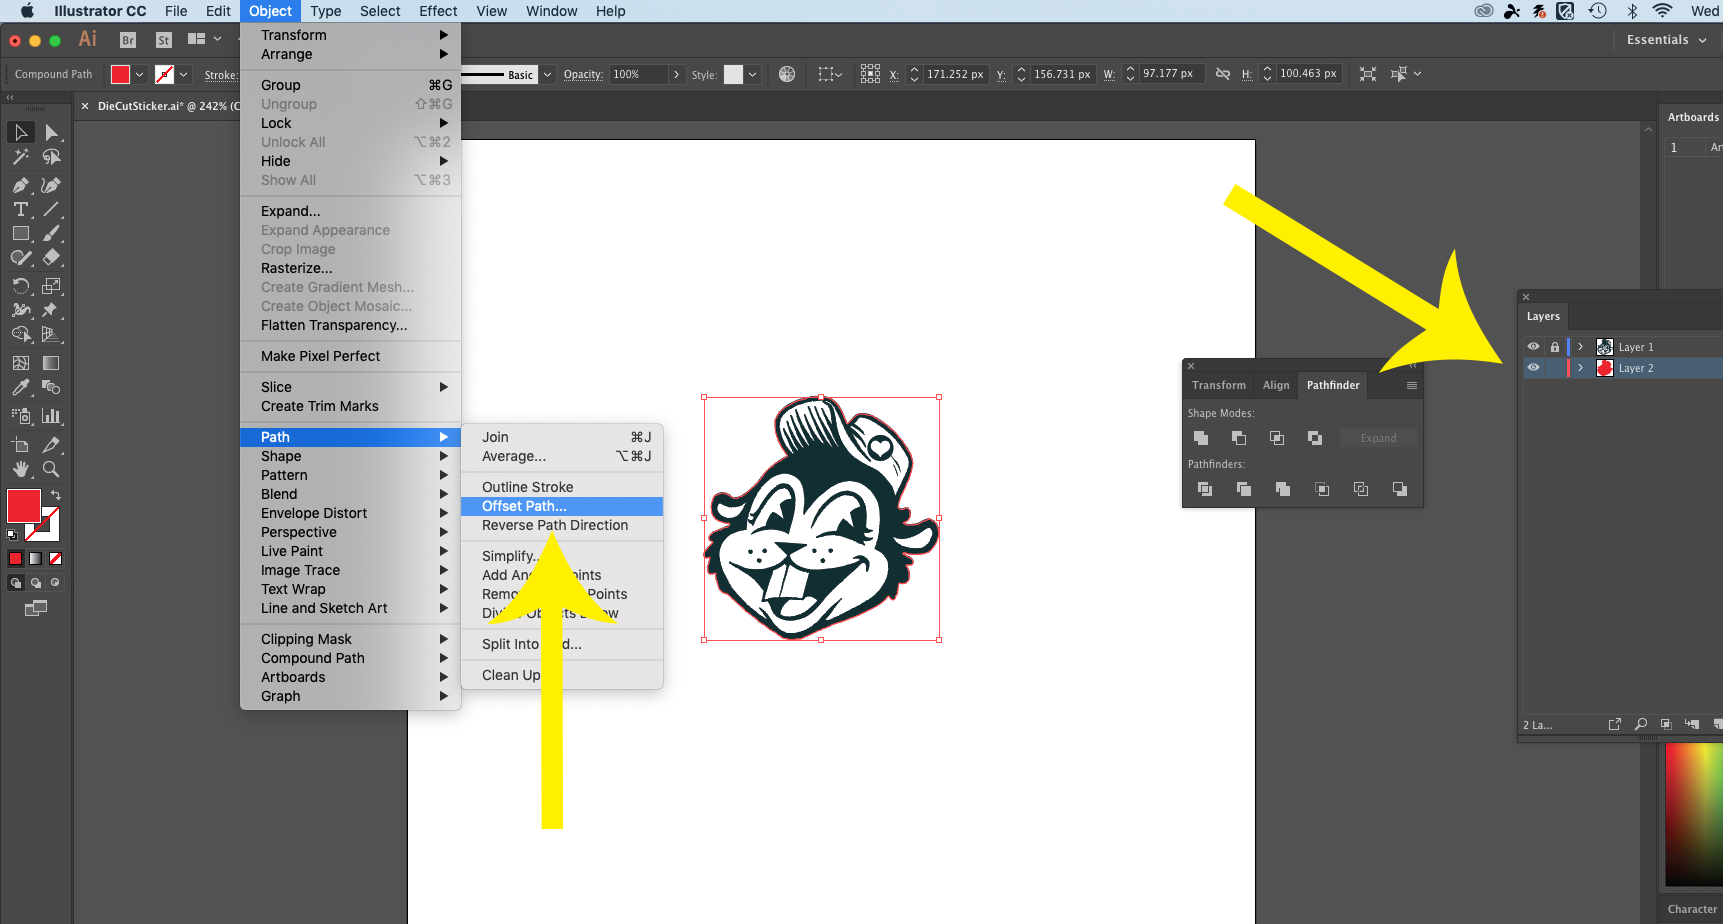
Step 3: Put your brightly colored object on a new layer and move it below the layer with your design on it. To make sure we were definitely working in the right layer, we locked our design layer. The bottom layer that we are working in will become your dieline!
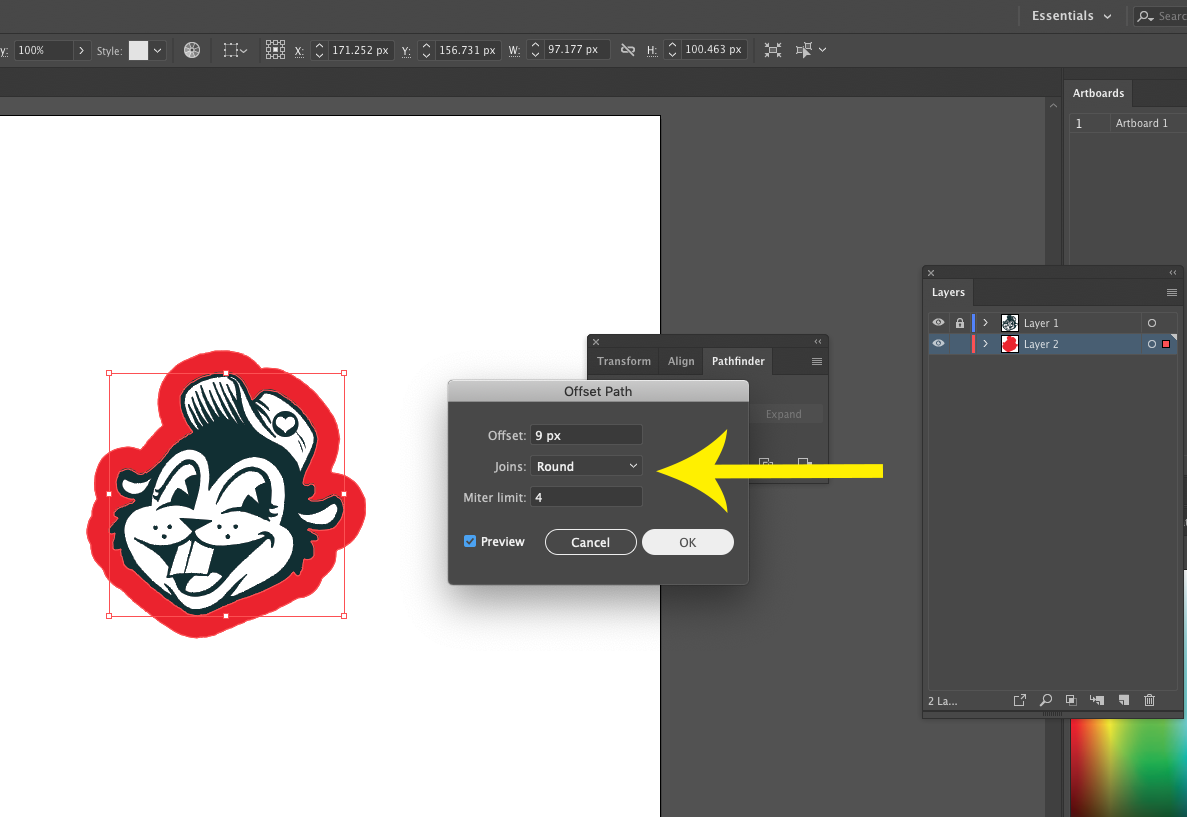
Step 4: Under the Object drop down, hover over Path and then select Offset Path.
Step 5: In the box, set Offset to at least .125 inches (or 9 pixels), this is the minimum we will need for your artwork to be print ready. Set Joins to Round so that the path you create molds around your design smoothly! Go ahead and hit Preview to make sure everything looks good! If it does, select OK!
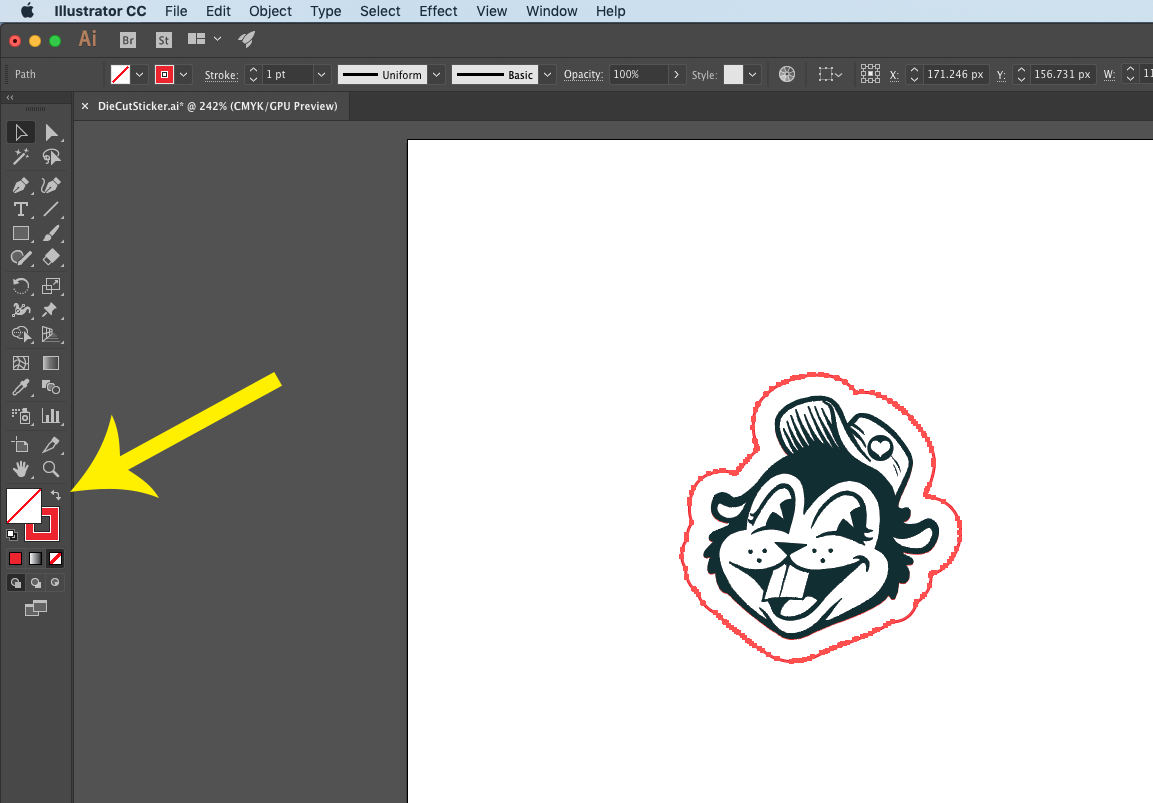
Step 6: The Final Step! Swap Fill and Stroke so that you're left with a nice outline! This will indicate to our designer where you want the cut made.
There you have it! Now you know how to make die lines in Illustrator. It’s easy, huh? Now go get started on some cool, die cut custom stickers using your new skills!